To cut acrylic mirror sheet, use a suitable acrylic-cutting saw and support both the sheet and waste. Reserve score-and-snap for thin sheets your supplier approves. Keep the protective masking on for mechanical cutting, protect the reflective backing, and test the setup on an offcut first.
A clean edge can still hide damaged mirror backing. You might finish a straight cut, peel the film, and discover a bright scratch through the reflection. Learning how to cut acrylic mirror sheet means protecting its layers as carefully as controlling the blade.
That matters whether you’re trimming a display base or preparing a decorative panel. A split corner, melted edge, or scored backcoat can make an otherwise usable piece unsuitable for its visible position.
This guide explains how to choose a tool and prepare the work. It also covers the cut itself and the checks before fitting. It draws on mirror-sheet fabrication guidance rather than assuming every technique for clear acrylic applies. Thickness, coating, masking, and machine setup still need to match the actual material you have.
Pontos-chave
Score-and-snap is limited to supplier-approved thin mirror sheet and straight cuts; published thickness limits differ.
Front masking is removable protection; the permanent reflective backing must remain intact.
Support both the finished piece and offcut, and use a sharp blade suitable for acrylic and your machine.
Laser cutting requires approval for the complete mirror material, including its coating and masking.
How to Cut Acrylic Mirror Sheet: Choose Your Method
Start with three facts: the sheet’s measured thickness, the shape you need, and the condition of the finished edge. Then check the supplier’s fabrication instructions. Cutting acrylic mirror with an unsuitable method can damage the coating even when the plastic separates successfully.
Job
Method to consider
Main condition
Simple straight trim in thin sheet
Acrylic scoring tool and snap
Supplier approves this sheet and thickness
Straight panel cuts
Guided circular, table, or panel saw
Suitable blade, guards, workholding, and offcut support
Broad curves or internal openings
Suitable jigsaw or professional routing
Supported sheet and a workable turning radius
Repeated profiles or detailed letters
Professional CNC routing or approved CO2 laser cutting
Confirm material compatibility and approve a sample
Large sheets without suitable equipment
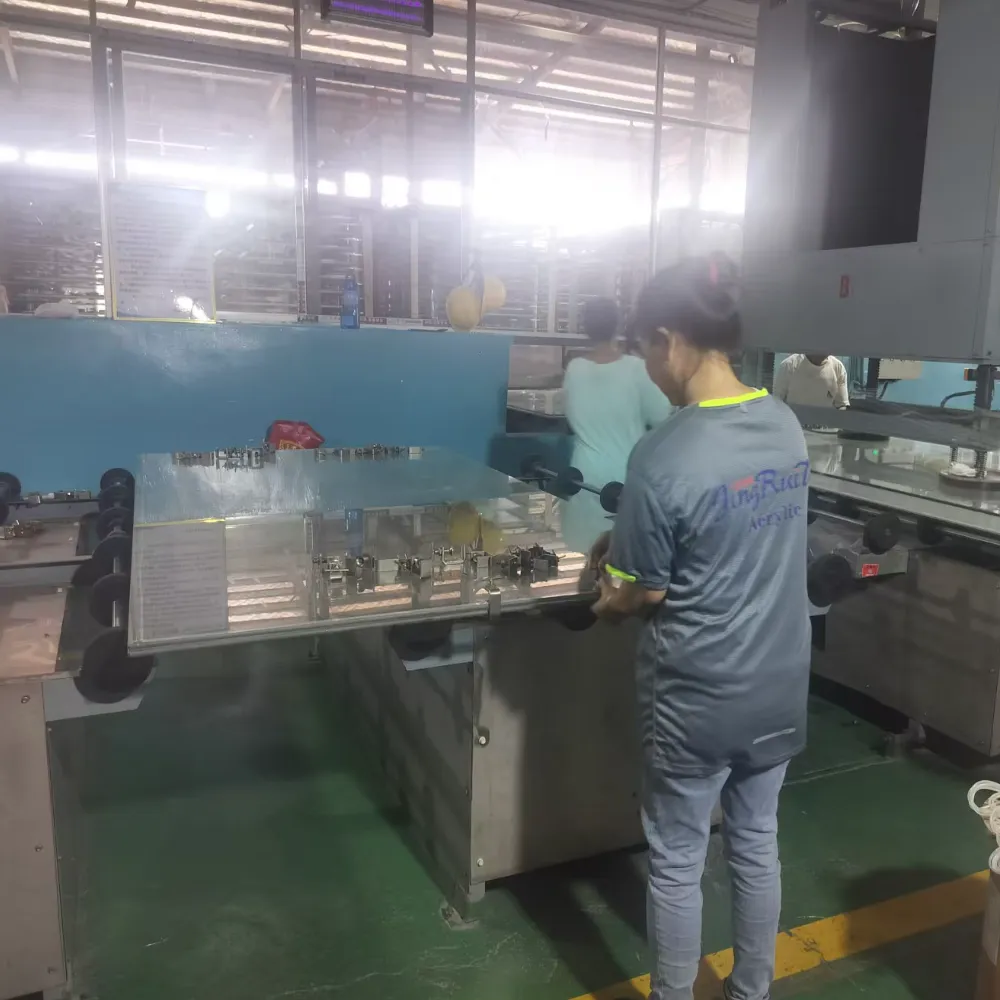
Supplier fabrication
Agree dimensions, finish, and acceptance criteria
A scoring tool makes a groove so the sheet can break along it. A saw removes a strip of material, called the kerf. Those methods need different allowances; neither should start with guessing which side of the line to keep.
If you’re selecting material before choosing the process, Explore JRT mirror sheet options and confirm the chosen grade’s fabrication requirements.
Protect the Mirror Face, Backing, and Cut Line
Identify the Layers Before Marking
A typical acrylic mirror has three parts: a plastic body, a reflective layer, and a protective backcoat. The front often carries removable masking. The plastic is PMMA, short for polymethyl methacrylate, commonly called acrylic.
The backcoat isn’t packaging. Don’t peel or scrape it away to expose a cutting line. Mark on the removable masking where possible, and avoid dragging either face across grit, loose screws, or saw chips.
Leave the front masking in place during mechanical work unless the sheet instructions require otherwise. This protection doesn’t make the surface scratch-proof. A chip trapped beneath the panel can still leave a mark when the sheet moves.
Prepare Support, Measurements, and Protection
Use a clean, stable work area and a support arrangement suited to the tool. Support the finished panel and the waste section. Keep the blade path clear and avoid pinching it. Large sheets may need an experienced second operator or a professional cutting service.
Measure the finished size and mark the waste side. Allow for the kerf and any material you will remove when finishing the edges. If the panel must fit a frame, confirm the required clearance rather than assuming a tight fit is appropriate.
Before cutting acrylic mirror, check the following:
Wear eye protection, with hearing and dust protection appropriate to the machine and task.
Use guards, fences, guides, and push devices as the machine manufacturer specifies.
Keep loose clothing, jewelry, and loose gloves away from moving cutters.
Isolate power before changing a blade, repositioning a setup, or clearing a jam.
Keep the cutting path clear of clamps, cables, and concealed fixings.
When testing how to cut acrylic mirror sheet, use the sheet, blade, masking, and support planned for the finished piece. If you change the setup, test it again.
How to Cut Acrylic Mirror Sheet by Hand or Saw
Score and Snap Only Approved Thin Sheet
O United States Plastic mirror fabrication guide describes scribing and breaking single sheets less than 3 mm thick. The Plasticsheetsshop hand-cutting tutorial limits its procedure to sheets up to 2 mm thick. These are source-specific instructions, not interchangeable guarantees for every mirror sheet.
If your supplier approves score-and-snap for the actual material:
Place the sheet on a clean, flat support and mark the straight cut on its masking.
Secure a straightedge and score the supplier-approved surface with an acrylic scoring tool, keeping hands clear of its path.
Repeat controlled passes in the same groove as instructed. Don’t try to force the tool through the sheet.
Align the score with a straight bench edge, secure the retained portion, and apply the prescribed breaking pressure to the waste.
Inspect the break and coating before deburring the edge.
Don’t score into the permanent mirror backing unless the material’s instructions specifically require that procedure. If the break wanders or cracks enter the retained part, stop. Sanding won’t remove a crack that extends into the panel.
Hypothetical example: Jamie’s display insert
Jamie needs a 250 × 350 mm rectangular insert from a 2 mm mirror sheet. The supplier approves hand scoring for that grade, so Jamie first tests a strip from the same sheet. In this example, the test break stays straight and the reflective edge remains intact.
Jamie then uses the same supported setup for the insert. The sheet’s stated thickness alone wouldn’t be enough reason to snap it.
Make Straight Saw Cuts With a Compatible Setup
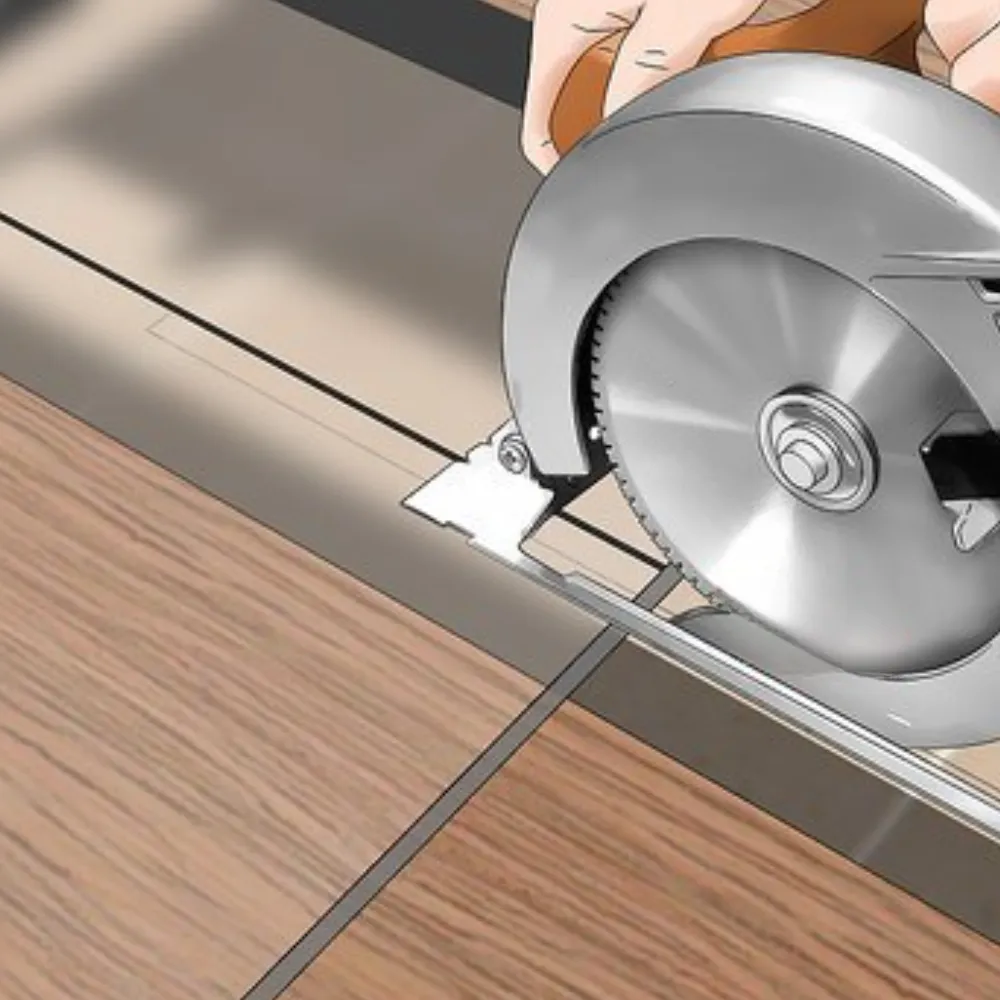
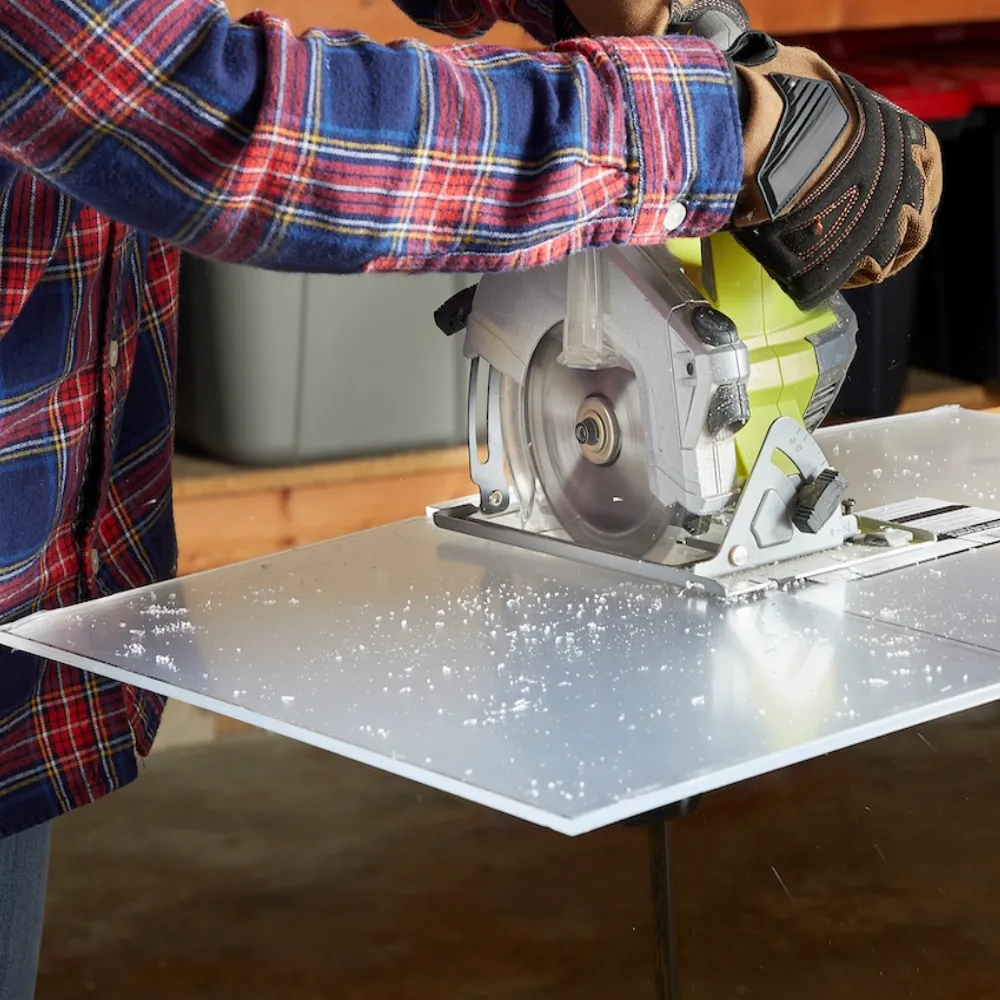
For thicker pieces or long straight cuts, a suitable saw may be the better option. This is where acrylic mirror cutting differs from simply snapping a thin offcut. The United States Plastic guide gives a 10-inch, 80-tooth carbide blade with a triple-chip tooth design as an example for its circular/table/panel-saw procedure. Triple-chip teeth alternate cutting shapes to help clear chips.
That example isn’t a reason to install a blade of the wrong diameter or speed rating. Check the diameter, arbor fit, speed rating, and guard clearance with the blade maker. Confirm that the blade suits the sheet thickness. Don’t choose by tooth count alone.
Set up the guide or fence and support the panel and offcut according to the machine manual.
Check which face should be up for this sheet and tool. The United States Plastic procedure specifies masked-face-down. That doesn’t apply to every saw setup.
Position the kerf on the waste side, allowing for any planned finishing.
Start the cut as the machine instructions require, then maintain a controlled, even feed without forcing the sheet.
If the material chatters, melts, binds, or chips badly, stop safely and let the blade halt before investigating.
Support the final part of the cut. Inspect the sample before cutting finished parts.
Don’t improvise a coolant or spray around a powered tool. Use only cooling and chip-removal methods approved for both the machine and the mirror material.
Curves, CNC Routing, and Laser Cutting
Give a Jigsaw Room to Turn
A suitable jigsaw can cut mirrored acrylic into broad curves and openings, but vibration and blade heat need attention. United States Plastic specifies at least 14 teeth per inch (TPI) for its saber/jigsaw guidance. This remains a reference example; select a blade approved for the actual material and tool.
Support the sheet close to the cut while keeping the blade path clear. Keep the shoe seated as instructed. Don’t twist the blade into a tight corner. A curve smaller than the blade can follow needs a different tool or a revised design.
For an internal opening, create a starter hole using the sheet supplier’s drilling procedure. Keep its size and position within the waste area. Don’t plunge an ordinary saw blade through an unprepared mirror panel.
Use Professional Processes for Detailed Profiles
Computer numerical control (CNC) routing uses a spinning cutter to follow a programmed shape. It can help when you need repeated shapes that are hard to guide by hand. Agree the cutter size, how the part will be held, and the edge finish with the fabricator. Check the smallest inside curve, too.
A carbon dioxide (CO2) laser can also cut approved mirrored acrylic. Every layer must suit the process. Identify the plastic, reflective coating, backcoat, adhesive layers, and masking before the operator accepts it. General instructions for clear acrylic don’t approve an unknown mirror product.
O Epilog acrylic laser guidance warns against leaving acrylic laser work unattended because it can ignite. Use the machine’s required extraction and operating controls. Follow its instructions for masking and which face should be up. Don’t leave an unknown film on because a generic tutorial does.
Hypothetical example: Morgan’s mirrored letters
Morgan needs 24 decorative letters with narrow internal spaces. Rather than cutting the whole batch from an untested file, they ask a fabricator for one sample containing the smallest corner and thinnest stroke. In this example, the sample reveals a fragile detail. Morgan widens that part before approving the batch.
The sample catches a design problem before it becomes 24 rejected parts. It doesn’t prove a minimum stroke width that works for every mirror sheet.
For a drawing that needs supplier input, Discuss acrylic processing options with JRT and ask which process suits the selected mirror grade. Ask about the exact mirror sheet. A general acrylic service listing doesn’t approve every mirror grade.
Finish the Edges and Diagnose Cutting Problems
Deburr Without Damaging the Reflection
Keep the faces protected while removing sharp burrs from the cut edge. Use a supplier-approved scraper or sanding method, working carefully along the edge. Don’t sand across the front face or through the reflective backing.
An edge hidden in a frame may need only a clean, safe finish. An exposed decorative edge may need professional finishing. Agree the required look before cutting. A rough saw cut and a polished display edge need different checks.
Don’t treat flame polishing as a routine home repair. Heat can damage the coating and introduce stress. Laser-cut edges may also retain stress, so ask the supplier about further processing before applying adhesives or undertaking additional finishing.
Remove loose debris with a soft cloth and use mild soap and water when cleaning is needed, following the sheet instructions. Avoid acetone, alcohol, abrasive cleaners, and unapproved solvents. A chemical that cleans one plastic can attack another coating or stressed edge.
Read the Defect Before Changing the Tool
What you see
What to check before the next cut
Chipped corners or a jagged edge
Blade suitability and sharpness, support, vibration, and feed
Melted beads or a closing kerf
Heat buildup, chip clearance, blade condition, and approved settings
Bright marks through the reflection
Scratched or removed mirror backing; sanding won’t restore it
A snapped edge wandering into the part
Scoring approval, groove alignment, thickness, and support
A wavy reflection after mounting
Flatness of backing, panel bending, and fastener pressure
Change the likely cause, then make another sample. When cutting acrylic mirror, don’t keep forcing a failed setup through valuable material. A different product from the acrylic sheet range may also require different fabrication instructions, even if it looks similar.
Acrylic Mirror Cutting Questions
Can Acrylic Mirrors Be Cut at Home?
Yes, if you have approved material, suitable equipment, and a safe way to support it. Small straight trims in approved thin sheet may suit hand scoring. To cut mirrored acrylic into curves, choose another approved method. Large panels, intricate shapes, or tight fit requirements can justify professional acrylic mirror cutting instead.
Can You Cut Mirrored Acrylic Without a Saw?
Yes, supplier-approved thin sheets can sometimes be scored and snapped along a straight line. A glass cutter or utility knife isn’t automatically a suitable replacement for an acrylic scoring tool. If the sheet isn’t approved for snapping, use a different process. Don’t force it.
Can a Dremel Cut Acrylic Mirror Sheet?
A rotary tool may trim suitable material with an approved accessory. Long, straight freehand cuts are difficult. Heat, chips, and accidental face contact can damage the result. Test an offcut and use the tool’s guards and instructions; don’t assume any abrasive disc is suitable.
What Are the Downsides of Acrylic Mirrors?
They can scratch, and the reflected image can distort when a flexible panel bends or follows an uneven backing. Cutting adds risks of chipped plastic and damaged reflective coating. A polished edge doesn’t guarantee a flat reflection after installation.
What Is an Acrylic Mirror Sheet?
It’s an acrylic plastic sheet with a reflective coating, usually protected by a backcoat. The plastic provides the body, while the coating produces the mirror effect. Removable protective masking helps during handling but isn’t the reflective layer itself.
Check the Cut Before You Install
Check the finished dimensions, edge condition, both faces, and reflective backing while the panel is still on a clean support. Look for chips that extend beyond the edge and scratches visible through the reflection. Don’t hide a defect inside a frame before deciding whether the part meets its intended use.
For the next cut, keep a record of the sheet grade, thickness, blade or process, support method, and accepted sample. That gives you a useful starting point for repeat work. It also makes a supplier conversation more specific than asking which tool is “best.”
Before installation, confirm the mounting method and a suitably flat backing. A well-cut panel can still look wavy when bent or fixed unevenly. Keep compatible cleaning and adhesive requirements with the project notes.
If you’re deciding how to cut acrylic mirror sheet for a specific project, Send JRT your cutting requirements with the thickness, finished sizes, quantity, drawing, and edge finish. Ask for confirmation of the material and fabrication route before approving the job.
Introdução As chapas acrílicas, apreciadas pela sua clareza ótica (transmissão de luz 92%) e versatilidade, estão a revolucionar as indústrias, desde a aeroespacial à dos cuidados de saúde. Com um mercado global esperado...
Introdução As folhas de cloreto de polivinilo (PVC) são um elemento básico na construção, nos cuidados de saúde e na eletrónica devido à sua durabilidade, resistência química e eficácia em termos de custos. Com o mercado global de PVC...
Em aplicações onde a segurança, a beleza e a durabilidade são essenciais, há um material que se destaca: a chapa acrílica retardadora de chama. Para projectos em edifícios, transportes públicos ou edifícios de...
Quem já se informou sobre o custo da instalação de um espelho que ocupa toda a parede sabe quais são as desvantagens associadas ao vidro: o peso, a equipa de instalação, a responsabilidade civil caso...