How to Glue Acrylic Tube: Joint Fit, Cement, and Cure Checks
To glue acrylic tube, confirm the tube material and mating surface, choose a cement documented for that combination and joint, and follow its current preparation, application, and cure instructions. Dry-fit the parts and approve a representative sample before repeating the assembly.
A clear joint starts with a compatible material and a joint that fits. If you have already cut a tube to length, it is tempting to focus on which bottle to buy. This guide explains how to glue акриловая трубка by working through the joint, the product documents, and the checks that come before use.
Основные выводы
Identify both materials, including the actual acrylic grade and any surface coating.
Measure the joint and dry-fit it before choosing an application method.
Use the selected cement’s current technical and safety documents.
Separate working time, fixture time, and approval for the intended use.
Check a sample joint against written requirements before making a batch.
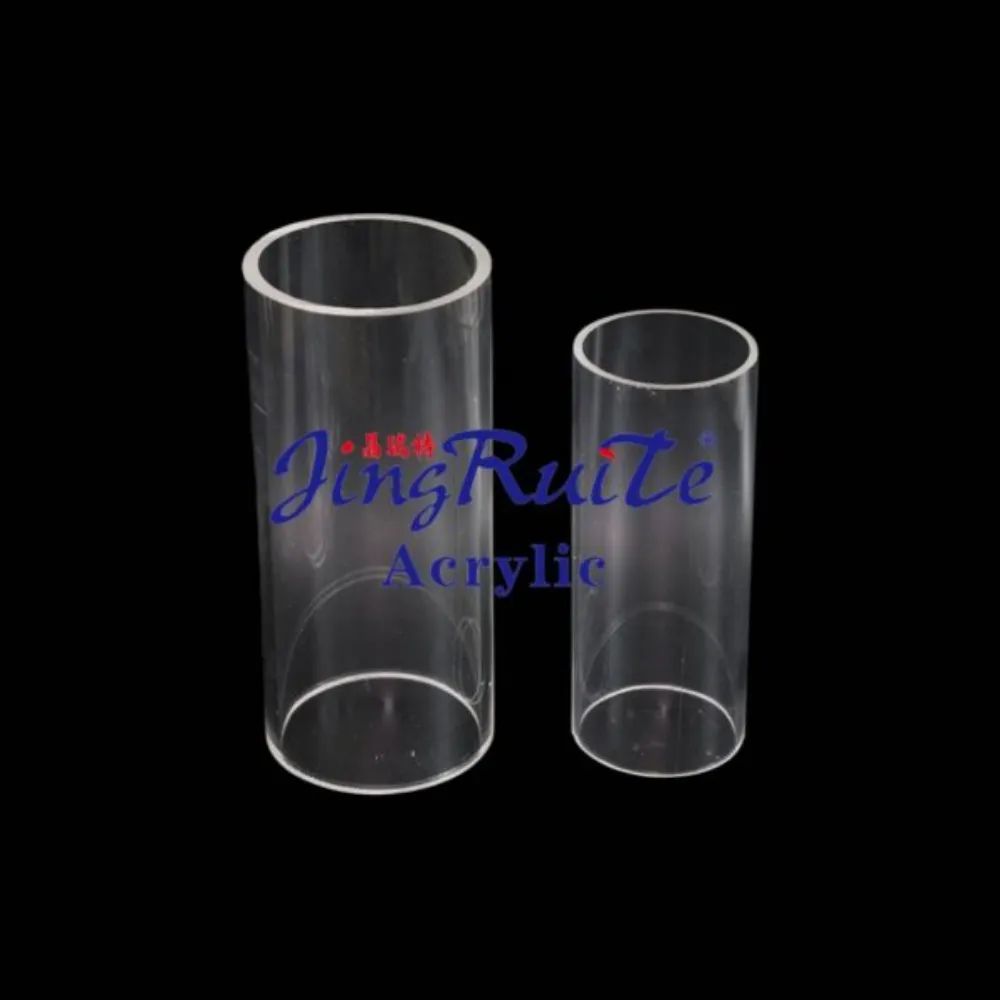
Here, acrylic tube means hollow tubing made from polymethyl methacrylate, or PMMA. It does not mean glue supplied in a tube. Check the material record rather than judging a clear plastic by its appearance.
Record the grade and whether the tube is cast or extruded. Also identify any coating or treatment on the bonding area. These details give the adhesive supplier something specific to review when you ask how to glue acrylic tube.
You can review JRT’s acrylic tube options when discussing the material. Ask for the information relevant to your part; a general product description does not establish a finished joint’s performance.
Draw the Intended Joint
A tube attached to a flat base presents a different contact shape from a sleeve joining two sections. Sketch both parts, their contact surfaces, and the direction in which they must align. Identify whether the joint is visible and whether it will need further processing.
Before deciding how to glue acrylic tube, write down what the assembly must do. A display cover, a model part, and a component exposed to liquid have different review needs. A clear-looking bond alone does not confirm suitability for any of them.
Примерный сценарий: A display maker wants a clear cylinder attached to a base. While planning how to glue acrylic tube, they notice that the drawing says only “clear joint.” They add alignment and appearance requirements before asking a processor to review the assembly.
Decide who will approve the sample and what they will inspect. Put the required dimensions and finish on the drawing. If the application needs a separate engineering or compliance review, arrange that before treating the joint as ready for service.
How to Glue Acrylic Tube: Choose a Documented Cement
Start with Compatibility and Fit
A label saying “plastic glue” is not enough information. Look for documentation covering the actual materials, their condition, and the proposed bonding method. If that information is missing, ask the product manufacturer before proceeding.
ACRYLITE’s cementing manual discusses commercial acrylic cements and directs users to product safety information. Its main fabrication context is sheet. Use it as background, while confirming the details needed to glue acrylic tube in your particular joint.
Compare Adhesive Categories Carefully
Do not choose by viscosity alone. A thin cement, a thicker product, and a reactive adhesive may require different preparation and application procedures. The product documents must support the choice; the category name does not approve the assembly.
Category to discuss
Information to confirm
Avoid assuming
Thin solvent cement
Supported materials, fit, and application method
Extra liquid can correct any gap
Viscous cement
Permitted joint conditions and application limits
Every thick product fills every gap
Reactive adhesive system
Components, preparation, and cure procedure
A stronger-sounding name guarantees suitability
The ACRIFIX solvent cement range provides a useful example of product-specific selection. Read the information for the exact product under consideration. Do not transfer another product’s instructions because the bottles serve a similar market.
Read the Current TDS and SDS
When checking how to glue acrylic tube, obtain the technical data sheet, or TDS, and safety data sheet, or SDS, for the product supplied in your region. Match the name, formulation, and revision to the container. An old search result or a reseller summary may describe a different version.
Use the TDS to resolve the permitted process and the SDS to plan handling, ventilation, protective equipment, storage, and disposal. Do not mix products or prepare homemade solvent cement. If the required controls are unavailable, arrange appropriate fabrication rather than improvising.
Prepare and Dry-Fit the Joint
Inspect the Contact Surfaces
Check the cut end and mating surface before adding cement. Look for visible chips, damage, contamination, or an end that prevents the parts from seating as intended. Record anything that needs correction under the chosen fabrication process.
If end preparation is still unresolved, use the separate guide to cutting acrylic tube to frame that discussion. Knowing how to glue acrylic tube includes recognizing when the joint is not yet ready for adhesive. More cement is not an inspection method.
Avoid polishing or treating the contact area simply because it looks rough. Ask what surface preparation the selected process requires. A display finish and a bonding surface are different requirements, so define each before further work.
Measure the Actual Parts
Record outside diameter, inside diameter, and relevant mating dimensions. The acrylic tube sizes guide explains the sizing terms; use measurements from the actual parts when reviewing the fit. Nominal catalogue dimensions do not describe every feature of a particular joint.
Dry-fit without adhesive, following the planned assembly arrangement. Check alignment, contact, and whether the parts can remain positioned without being forced. Do not invent a universal clearance or rely on pressure to correct a mismatch.
Примерный сценарий: A model builder plans a sleeve connection using two nominal sizes. During the dry fit, the actual parts do not seat as expected. Instead of trying to glue acrylic tube with extra liquid to hide the mismatch, they return to the dimensions and ask for a suitable joint arrangement.
Use the Approved Cleaning Method
Confirm which cleaner and drying procedure the material and adhesive suppliers permit. Do not assume alcohol, acetone, or another familiar solvent is suitable for every acrylic grade and surface. Keep the prepared area protected from further contamination as the process requires.
A dry-fit checklist helps turn the decision to glue acrylic tube into a repeatable review:
Material identities and contact surfaces are recorded.
Dimensions and alignment have been checked.
End preparation matches the chosen process.
Cleaning and drying requirements are available.
The fixture can hold the intended position.
How to Glue Acrylic Tube: Plan a Trial Assembly
Make the Trial Representative
Choose sample parts that reflect the intended material, joint shape, and preparation. Record what they match and how they differ from the final part. A handy scrap joint may not tell you much about a different shape.
Before you glue acrylic tube for a batch, agree on the trial’s purpose. It might establish an appearance reference, confirm assembly access, or provide parts for an agreed evaluation. State the checks in advance so the result can answer a clear question.
Check Positioning and Access
Plan how the tube and mating part will be held throughout the documented process. Confirm that the fixture permits the required application access and does not distort the parts. Rehearse the sequence without cement where the process allows.
Consider how the assembler will reach the entire intended joint. A sheet example showing an accessible straight edge does not establish the correct method for a circular or enclosed connection. Ask the adhesive supplier to review that difference before you glue acrylic tube.
Apply According to the Selected Product
Use the product’s instructions to determine the application position, quantity, sequence, and timing. This guide does not prescribe a universal dose, gap, clamp force, or waiting period. Those details depend on the documented system and the joint being made.
If the instructions do not address the proposed arrangement, pause the trial and seek clarification. Do not adapt an unfamiliar process by combining steps from several products. Keep the trial record with the sample so later reviewers know what was actually done.
Separate Fixture Time from Service Readiness
Read Each Time Label
Working time, fixture time, and later strength development describe different stages. When you glue acrylic tube, read the selected product’s definitions and conditions rather than treating any one time as permission to use the finished assembly.
For example, U. S. Plastic’s Weld-On 4 listing distinguishes a 1–2 minute working time, a 3 minute fixture time, and 72 hours to reach 80% of ultimate bond strength. These are attributed product figures, not general acrylic tube settings or proof that a joint may hold liquid after that period.
Confirm the current manufacturer’s documents before relying on the supplied product’s timing. Do not substitute a historical 4SC document for a different product name or formulation. Product identity matters as much as the number beside “cure.”
Keep a Useful Process Record
A record helps explain how you planned to glue acrylic tube and what happened during the trial. It also keeps the sample connected to the documents used at the time.
Record field
What to retain
Product identity
Exact name, lot, and relevant document revision
Parts
Material grades, dimensions, and joint drawing
Подготовка
Approved surface and cleaning process
Сборка
Fixture, sequence, and recorded conditions
Hold point
Required wait and who may approve the next stage
Evaluation
Inspection results and unresolved questions
Agree on Release Before Use
Примерный сценарий: An assembler sees a short fixture time on a product listing and initially schedules immediate use. While reviewing how to glue acrylic tube for the project, they separate positioning from later acceptance. The schedule now includes the manufacturer’s requirements and the agreed review before release.
Do not use a clear appearance or a firm feel as the sole release test. The application owner must define what evidence is needed. If liquid containment, loading, or a regulated use is involved, obtain the relevant design and material review instead of borrowing a general display-making procedure.
Review Defects and Specify Fabricated Parts
Describe What You See
If a trial shows bubbles, whitening, visible cracks, movement, or another unwanted feature, record the location and appearance. Keep the sample and process details for review. A photo can help explain the issue. It does not prove what caused it.
When learning to glue acrylic tube, resist changing several things at once without a plan. Ask the material or adhesive supplier which checks are relevant. Review the joint fit, preparation, product identity, and recorded conditions before repeating the same process.
Resolve the Cause Before Repairing
Do not assume an unwanted gap or leak can be corrected by adding more cement. Establish whether the chosen system permits a repair and whether the part remains suitable for evaluation. A repaired appearance is not evidence of restored performance.
If your reason to glue acrylic tube involves pressure or a structural duty, this general guide cannot approve the design. Request application-specific review. Do not improvise a pressure test or treat an unverified joint as safe because it held during a brief trial.
Close with a Clear Request
For a useful supplier discussion, provide the tube grade, outside and inside diameters, mating material, drawing, quantity, and intended use. Add the required appearance, alignment, inspection, and any documents the finished assembly needs. Ask the supplier to confirm its actual scope rather than assuming it sells adhesive or certified bonded assemblies.
Ready to discuss your tube requirements?Contact JRT with the dimensions and joint drawing. A measured dry fit, clear acceptance requirements, and a documented trial make the discussion about how to glue acrylic tube more productive.
Часто задаваемые вопросы
What Glue Works with Acrylic Tube?
Choose a product documented for the actual PMMA grade, mating material, and joint conditions. To glue acrylic tube reliably for a particular project, first resolve those details with the material and adhesive suppliers. A plastic glue label does not answer those questions.
Can I Use Superglue?
Do not assume that every superglue product suits the tube, finish, and intended use. Check the exact formulation’s documentation and evaluate a representative sample. The same product-specific review applies to epoxy or ПВХ cement; category names alone do not establish compatibility.
Can Thin Cement Fill a Gap?
Do not count on extra thin cement to correct an unsuitable joint. Confirm the selected product’s fit requirements and permitted method. If the dry fit is wrong, resolve the geometry before attempting to glue acrylic tube.
How Long Should I Wait Before Handling the Assembly?
Follow the selected product’s instructions for the actual conditions and joint. Distinguish permitted handling from release for use. A fixture time quoted on a listing does not establish full strength or approval for liquid contact.
Is a Clear Joint Waterproof?
Appearance alone cannot establish liquid containment or service suitability. Define the application and obtain the required material, joint, and evaluation guidance. Do not infer drinking-water, aquarium, or pressure approval from a transparent bond.
Can I Bond the Tube to Another Plastic?
Only use a system supported for both identified materials and their surface conditions. When deciding how to glue acrylic tube to another plastic, provide both grades and the joint drawing to the adhesive supplier. Test and evaluate the agreed sample before repeating the assembly.
Введение Акриловые листы, ценящиеся за свою оптическую чистоту (светопропускание 92%) и универсальность, совершают революцию в различных отраслях промышленности - от аэрокосмической до здравоохранения. Ожидается, что мировой рынок...
Введение Поливинилхлоридные (ПВХ) листы являются основным материалом в строительстве, здравоохранении и электронике благодаря своей долговечности, химической стойкости и экономичности. В условиях глобального рынка ПВХ...
Там, где важны безопасность, красота и долговечность, один материал стоит особняком: огнестойкий акриловый лист. Для проектов в зданиях, общественном транспорте или элитных...
Любой, кто когда-нибудь рассчитывал стоимость установки зеркала, занимающего всю стену, знает, с какими трудностями связано использование стекла: вес, необходимость привлечения монтажной бригады, ответственность в случае, если оно...